How to Replace a Kitchen Sink in 10 Easy Steps
A worn-out or leaking kitchen sink can make everyday chores frustrating, and choosing the right replacement may feel overwhelming. You’re not alone—many homeowners struggle to find a sink that fits properly and install it without leaks.
This guide explains how to replace a kitchen sink in 10 easy steps, so you can approach the project with confidence.
To replace a kitchen sink, measure the opening and confirm the new sink fits. Gather tools, clear the cabinet, and shut off the water. Disconnect the supply lines, drain, and faucet, then remove the old sink.
Clean and inspect the opening. Apply silicone, lower the new sink into place, and tighten its clips evenly. Reconnect the faucet and drain, restore water, and check for leaks.
Follow these steps closely for a smooth installation and helpful details ahead.
Key Takeaways
- Measure the existing opening, cabinet, countertop, and sink template to confirm the replacement sink will fit.
- Shut off water, release pressure, disconnect plumbing, and remove the old sink, clips, and caulk.
- Clean and dry the countertop, then test-fit the new sink and repair damaged edges.
- Install the faucet and strainer, apply silicone around the rim, position the sink, and tighten mounting clips evenly.
- Reconnect supply lines and the drain, restore water, and check every connection for leaks or proper operation.
Measure for a Compatible Kitchen Sink
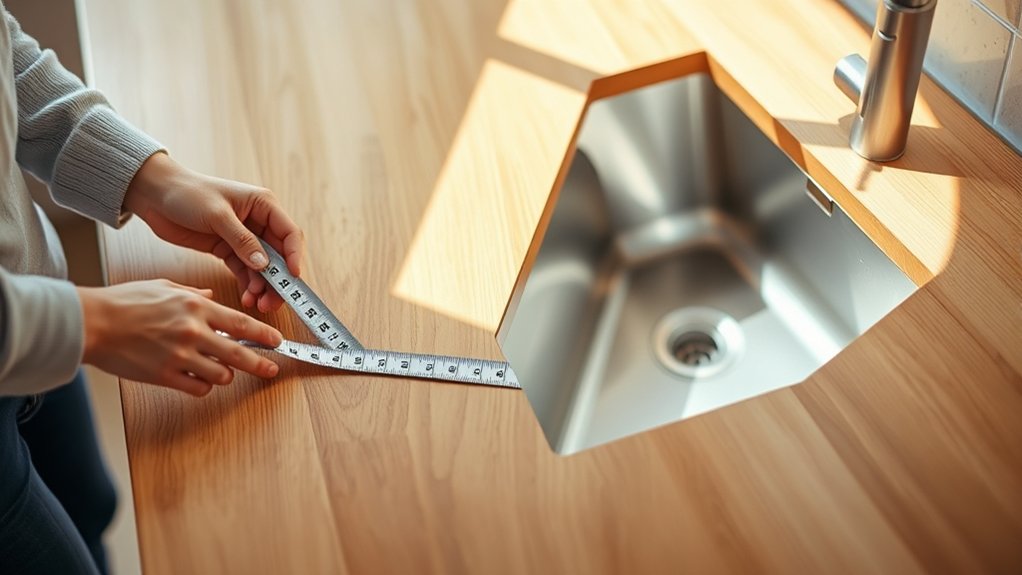
Before you buy a replacement, measure the existing sink opening to guarantee the new sink will fit. Remove the sink’s dimensions from the manufacturer’s specifications, then measure the cabinet width beneath it.
Record the opening’s length, front-to-back depth, and corner radius. Check whether the new model requires a larger cutout, a minimum cabinet size, or extra clearance for plumbing connections.
Measure the countertop thickness, too, especially if you’re choosing an undermount or farmhouse sink. Note the number, spacing, and size of faucet holes, as well as openings for a soap dispenser or sprayer.
Compare these measurements with the replacement sink’s installation template before purchasing. Don’t rely on appearance alone; small differences can prevent a proper fit.
Finally, consider basin depth and workstation features so you’ll have enough cabinet space below. You can then plan decorative accessories and color coordination around the sink’s finish, faucet, countertop, and backsplash for a cohesive kitchen design.
Gather Tools and Shut Off the Water

Gather the tools you’ll need: an adjustable wrench, basin wrench, screwdrivers, utility knife, bucket, towels, plumber’s putty, and silicone caulk. Keep a flashlight and work gloves nearby, too. Check each tool before you begin so you won’t pause midway through the project.
Protect the cabinet floor with towels, and place the bucket within reach for any water that remains in the lines. Before touching a connection, find the hot- and cold-water shutoff valves beneath the sink.
Turn both valves clockwise until they stop. Open the faucet briefly to release pressure, then close it. If the valves don’t work or your sink lacks individual shutoffs, turn off the home’s main water supply. Confirm that water has stopped before continuing.
Your preparation also supports replacing countertops, since careful tool selection prevents damage around the opening. When choosing sink materials, note that installation hardware may vary, so read the manufacturer’s instructions and gather any specified parts before starting.
Keep the workspace well lit and dry.
Clear the Cabinet and Disconnect the Plumbing
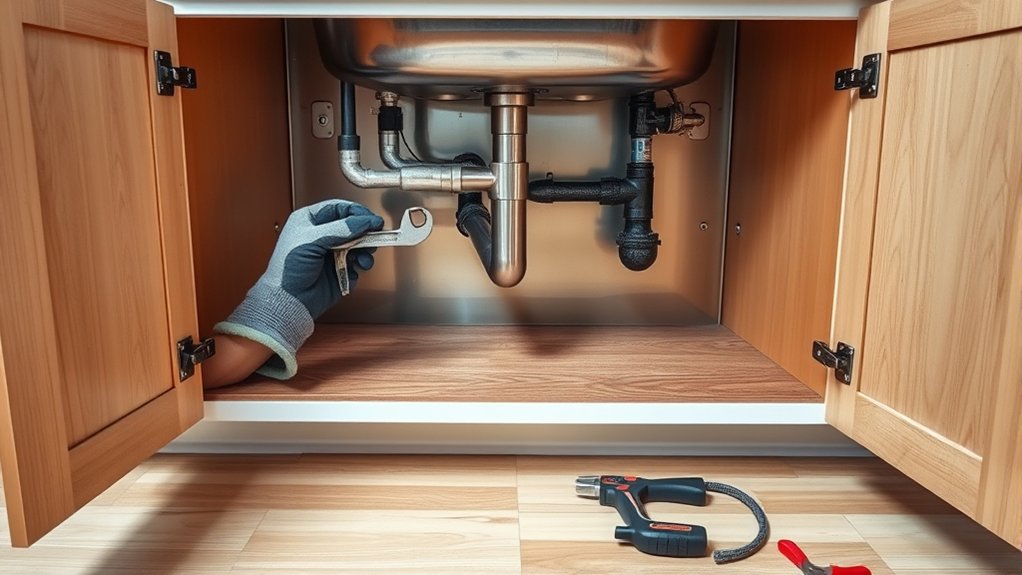
Clear everything out of the cabinet so you have room to work and can spot leaks easily. Set cleaners, bins, and stored items aside, then wipe away dust. Good Cabinet organization now makes future Plumbing maintenance simpler. Place a towel or shallow pan beneath the connections to catch residual water.
- Move cleaning products away from the work area.
- Keep a bucket centered beneath the trap.
- Lay towels around the cabinet floor.
- Put small washers and nuts in a labeled cup.
- Keep a flashlight nearby for dark corners.
Confirm both supply valves remain closed, then open the faucet briefly to release pressure. Use adjustable pliers to loosen the slip nuts connecting the P-trap.
Let trapped water drain into the pan, and avoid forcing brittle fittings. Next, loosen the nuts securing the hot and cold supply lines to the faucet tailpieces.
Cap or plug the lines temporarily if needed to prevent drips. Disconnect the drainpipe from the sink’s strainer assembly, keeping every washer in order.
Inspect connections for corrosion, cracks, or mineral buildup, and photograph the layout before proceeding.
Remove the Old Kitchen Sink
With the plumbing disconnected, cut through the old sink’s caulk bead with a utility knife, then remove any clips or brackets holding it to the countertop. Protect your hands with gloves, and wear eye protection as you work.
Disconnect plumbing, slice through the caulk, remove retaining clips, and wear gloves and eye protection before lifting the old sink.
If the sink has clips underneath, loosen each one with a screwdriver or wrench. For a heavy cast-iron or stone basin, ask someone to help you lift it safely.
Push upward from below while your helper supports the rim from above. If the sink sticks, slide a putty knife carefully around its edge to break remaining sealant.
Don’t pry against the countertop, since you could chip or crack it. Once the sink releases, lift it straight out and place it on a padded surface.
Handle old sink materials carefully; porcelain and metal edges can be sharp. Removing the basin neatly preserves your kitchen design and makes the next replacement step easier.
Dispose of the old sink according to local recycling or waste rules.
Inspect and Prepare the Countertop Opening
Before installing the new sink, make sure the countertop opening matches the sink’s dimensions. Check the countertop for any damage, then clean and prepare the edges to ensure a secure fit.
Check Opening Dimensions
Check the countertop opening against the new sink’s template or manufacturer’s dimensions, measuring its length, width, and corner radius at several points. Use a measuring tape for straight edges and a ruler or contour gauge for curved corners.
Record the smallest measurements, then compare them with the sink’s required opening dimensions. Confirm that the template sits squarely and leaves the manufacturer’s recommended countertop support around every edge.
Don’t assume the old cutout matches the replacement sink. Even slight differences can prevent a proper fit.
- Measure front-to-back and side-to-side.
- Check each corner’s radius.
- Mark the centerline clearly.
- Compare measurements with the template.
- Note any mismatch before cutting.
If the opening runs small, mark the required enlargement. If it’s oversized, stop and confirm whether the sink’s rim will cover the gap.
Keep your measurements together for installation.
Inspect Countertop Condition
Inspect the countertop around the opening for cracks, swelling, delamination, or soft spots, especially near seams and sink edges. Press gently around the perimeter and watch for movement, which can indicate water damage or weakened support. Examine the countertop material closely, since laminate, wood, stone, and solid-surface materials show different warning signs.
Check for stains, warped sections, chipped corners, and exposed layers. Verify the edge integrity along every side of the cutout. A damaged edge may prevent the replacement sink from sitting level or sealing properly.
If you find minor damage, determine whether you can repair it without changing the opening’s dimensions. Replace or reinforce severely compromised areas before installing the sink. Don’t proceed until the surface feels firm, remains stable, and can support the new sink securely.
Clean and Prepare Edges
With the countertop confirmed sound, clean the sink opening to remove old caulk, adhesive, dirt, and loose debris. This gives your replacement a smooth, reliable seating surface.
Wear gloves, then scrape residue with a plastic putty knife to avoid scratching the counter. Wipe the rim with a damp cloth and mild cleaner, and let it dry completely.
Check every section for chips, swelling, uneven spots, or remaining sealant.
- Scrape hardened caulk from the opening’s rim.
- Brush dust from corners and mounting areas.
- Wipe grease away with a clean cloth.
- Sand rough laminate edges lightly, if needed.
- Dry the entire opening before edge sealing.
Test-fit the sink before applying fresh sealant. Confirm it sits level, overlaps the opening evenly, and leaves no visible gaps.
If you find damage, repair it before installation. A clean, dry, smooth edge helps the new sealant bond securely and prevents water from reaching the countertop or cabinet below.
Install the Faucet and Sink Strainer
Before setting the sink in place, install the faucet and sink strainer while you can easily reach the openings.
For faucet installation, place the gasket or mounting plate over the faucet openings, then lower the faucet through them. From underneath, slide on the washer and mounting bracket, thread the mounting nuts, and tighten them evenly with a basin wrench.
Don’t overtighten, or you could damage the sink or faucet base. Connect the hot and cold supply lines to the matching faucet shanks, and leave the other ends accessible for later connection.
For strainer replacement, roll plumber’s putty into a rope and press it beneath the strainer flange. Push the strainer through the drain opening, then fit the rubber gasket, friction ring, and locknut underneath.
Tighten the locknut firmly while keeping the strainer aligned. Wipe away squeezed-out putty, and verify that the drain tailpiece and washers are ready for assembly.
Check every connection before moving the sink.
Apply Caulk and Set the New Sink
Apply a continuous bead of waterproof caulk around the sink’s rim. Then, carefully lower the new sink into the countertop opening, making sure it lines up with the edges. Press it firmly into place to create a watertight seal.
Apply Waterproof Caulk
Once the sink opening is clean and dry, run a continuous bead of waterproof silicone caulk around its rim. Keep the bead even, without gaps or excessive buildup.
Your caulk application should create a reliable barrier between the countertop and sink edge, preventing moisture from reaching the cabinet below. For a neat, waterproof seal, hold the caulk gun at a consistent angle and move steadily.
- Choose kitchen-and-bath silicone labeled mildew resistant.
- Cut the nozzle at a slight angle for control.
- Keep the bead inside the opening’s edge.
- Smooth the surface with a damp, gloved finger.
- Wipe away excess caulk before it skins over.
Check the entire rim for thin spots, breaks, or bubbles. Add caulk where needed, then smooth each repair immediately.
Follow the manufacturer’s curing instructions before exposing the seal to water. Don’t rush this step; a uniform seal helps protect your countertop, cabinetry, and surrounding surfaces from leaks and damage.
Set the New Sink
With the caulk in place, lower the new sink straight into the countertop opening, keeping it centered and avoiding contact with nearby surfaces. Press firmly around the rim to create an even seal, then check that the reveal looks consistent on every side.
If the sink shifts, reposition it before the caulk skins over. Your Sink material affects handling. Stainless steel is light, while cast iron may require help to prevent countertop damage.
Color options also influence the room’s appearance, so confirm the finish complements your faucet and counters before securing it.
From beneath the counter, install the clips or brackets included with the sink. Tighten each fastener gradually in a crisscross pattern, stopping when the rim sits snugly.
Don’t overtighten, or you could crack the counter or distort the seal.
Secure the Sink With Mounting Clips
After positioning the sink in the countertop opening, secure it from below with the manufacturer’s mounting clips. Crawl beneath the cabinet and locate each clip around the sink’s rim.
Secure the sink from below by locating and attaching the manufacturer’s mounting clips around the rim.
For proper mounting clip installation, slide every clip into its track, then tighten the screws gradually with a screwdriver. Work in alternating locations so the rim pulls down evenly instead of shifting or bending.
Use these sink stabilization techniques while you work:
- Check that the sink rim sits flush against the countertop.
- Tighten opposite clips in small increments.
- Keep the clips aligned with the sink’s mounting channel.
- Wipe away squeezed-out sealant before it cures.
- Test for movement by gently pressing each corner.
Don’t overtighten the screws, since excessive force can damage the countertop, clip, or sink. Continue around the basin until the rim feels firmly seated and no gaps remain.
If the clips won’t engage, loosen them, reposition the sink, and try again. Finish by inspecting the entire perimeter from below and above.
Reconnect the Water and Drain Lines
Attach the water supply lines to the faucet’s hot and cold valves, and tighten each connection securely. Next, connect the drain assembly beneath the sink, making sure the trap and tailpiece fit properly. Before turning on the water, check each joint to ensure it’s snug and sealed.
Attach Water Supply Lines
Reconnect the water supply lines by hand-tightening each line to the matching faucet valve, then snug the connections with an adjustable wrench without overtightening. Confirm hot and cold lines reach their correct valves, and replace worn washers before connecting.
- Check flexible connectors for kinks or cracks.
- Match pipe materials and fittings carefully.
- Keep shutoff valves accessible beneath the sink.
- Open each valve slowly while watching joints.
- Wipe connections dry, then check for drips.
Turn on the faucet briefly to purge air, then inspect every connection again. If you spot moisture, close the valve, release pressure, and tighten the fitting slightly.
Don’t force old valves; replace them if they won’t close fully. Choosing efficient fixtures supports water conservation, while compatible pipe materials help prevent corrosion and leaks.
Keep a towel nearby during testing, and verify both supply lines remain secure after several minutes. Guarantee the cabinet stays dry before storing supplies.
Connect Drain Assembly
With the sink secured, connect the drain assembly by fitting the strainer, tailpiece, and P-trap, then align the drainpipe with the wall outlet.
Slide slip-joint nuts and washers onto each connection, and tighten them by hand before giving each nut a slight turn with pliers. Don’t overtighten, because you could damage the fittings or washers.
If your sink includes a garbage disposal or dishwasher hose, attach it to the tailpiece or disposal inlet with a clamp.
Confirm every joint slopes slightly toward the wall, allowing water to drain properly. Check Plumbing code compliance for trap placement, venting, and pipe size.
Turn on the faucet and inspect for leaks. Tighten connections as needed, then wipe everything dry.
Regular Drain pipe maintenance helps prevent buildup and future leaks.
Test for Leaks and Fix Issues
Turn on the faucet and let the water run while you inspect every connection beneath the sink for drips. Check the supply lines, shutoff valves, drain tailpiece, P-trap, and dishwasher hose. For accurate Leak detection, use a dry paper towel; even a tiny wet spot reveals a problem.
- Look for beads forming around threaded fittings.
- Watch the P-trap while draining a full basin.
- Feel joints for moisture without tightening blindly.
- Check the cabinet floor for spreading water.
- Keep a bucket and towel ready for cleanup.
If you find a leak, turn off the faucet and place a bucket underneath. Tighten slip nuts by hand, then add a quarter turn with pliers.
Don’t overtighten, or you may crack a fitting. For compression connections, reseat the line and tighten the nut.
Replace damaged washers, plumber’s putty, or tubing as needed. Run water again and repeat the inspection.
Dry everything thoroughly, then check once more later. This careful Plumbing maintenance protects your cabinet and confirms your new sink works properly.
Frequently Asked Questions
How Much Does Professional Kitchen Sink Replacement Typically Cost?
Professional kitchen sink replacement typically costs you $400–$1,500, including labor and standard materials. Cost considerations include the sink style, countertop modifications, plumbing changes, location, and disposal fees.
A basic drop-in sink usually costs less, while farmhouse or undermount models require more labor. DIY expenses may total $100–$600 for the sink, fittings, tools, and supplies, but you’ll need plumbing skills and time.
Get several local quotes before hiring a professional.
Can I Replace a Sink Without Replacing the Countertop?
Yes, you can often replace a sink without replacing the countertop, provided the new fixture fits the existing opening. Check sink compatibility by matching the cutout dimensions, mounting style, and faucet configuration.
An undermount replacement may require countertop removal if installers can’t access or support it safely. A comparably sized drop-in sink usually offers the simplest swap.
Measure carefully, inspect the counter’s condition, and hire a professional when stone fabrication or structural adjustments become necessary.
Which Kitchen Sink Materials Are Most Durable?
Stainless steel, fireclay, and granite composite rank among the most durable kitchen sink materials. For strong Material durability, choose thick-gauge stainless steel, which resists stains, heat, and impact, though it can scratch.
Fireclay handles heat and scratches beautifully but may chip. Granite composite resists dents, stains, and noise, although it needs careful cleaning.
In this Sink material comparison, stainless steel offers the best balance of affordability, resilience, and easy maintenance for most kitchens.
How Long Does a Kitchen Sink Replacement Usually Take?
A kitchen sink replacement usually takes two to four hours if you’re swapping a similar-sized model and the plumbing cooperates. You’ll need extra time for countertop modifications, stubborn fittings, disposal connections, or cabinet repairs.
With basic DIY plumbing skills, you can often complete sink installation in one day. A professional may finish faster, especially when rerouting pipes or fitting an undermount sink. Plan for water shutoff and cleanup time, too.
When Should I Hire a Professional Plumber for Sink Replacement?
Hire a professional plumber when your sink project feels like a storm cloud gathering overhead. You should call one if you find corroded or leaking pipes, need to modify plumbing, lack confidence with DIY plumbing, or face uncertain sink compatibility.
A professional can prevent water damage, guarantee secure connections, and handle permits when required. Choose expert help especially for undermount sinks, garbage disposals, unusual countertops, or persistent drainage problems you can’t safely resolve.
Conclusion
With the new sink seated firmly, turn on the water and watch each connection. A dry cabinet floor means your work has paid off.
Wipe away any extra caulk, replace the cabinet contents, and admire the clean lines of your upgraded kitchen. In just a few steps, you’ve traded an outdated basin for a bright, practical centerpiece.
Now, let the faucet’s steady stream and the sink’s fresh shine make everyday kitchen tasks feel easier. Your kitchen sink replacement is complete and ready for daily use.