10 Tips to Organize Kitchen Drawers Efficiently
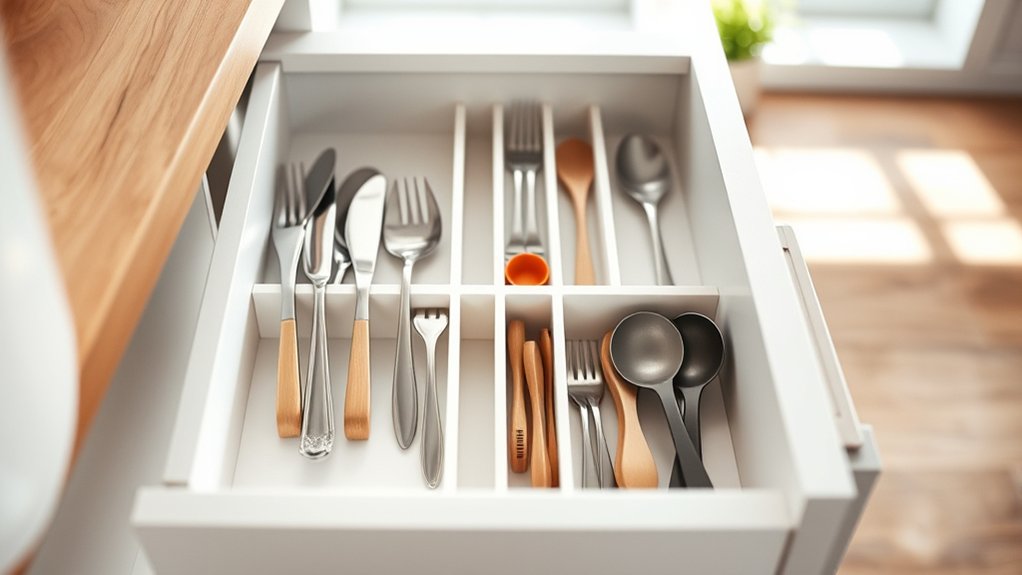
A cluttered kitchen drawer can make even simple meal prep feel frustrating. You’re not alone—many people struggle to find the right utensil quickly. These kitchen drawer organization tips can help you create a system that keeps everything visible, accessible, and easy to maintain.
Start by emptying each drawer and removing broken, expired, duplicate, or unused items. Group utensils by purpose, such as prep, cooking, baking, and serving.
Measure drawer dimensions before buying organizers, allowing for rails and hinges. Add adjustable dividers, nonslip liners, and tiered inserts to improve access.
Keep everyday tools at the front, knives in secure slots, and narrow drawers for specialized items. Return everything to its category after use and review the system regularly.
The following tips show how to refine it further.
Key Takeaways
- Empty each drawer, discard broken or duplicate items, and clean surfaces before reorganizing.
- Group utensils by function, creating dedicated zones for preparation, cooking, baking, serving, and seasoning.
- Measure drawer dimensions carefully, accounting for rails and hinges, before purchasing organizers or dividers.
- Use adjustable dividers, tiered inserts, nonslip liners, and knife-specific storage to maximize space and improve safety.
- Place frequently used tools at the front, label sections clearly, and review drawer organization regularly.
Declutter Your Kitchen Drawers First
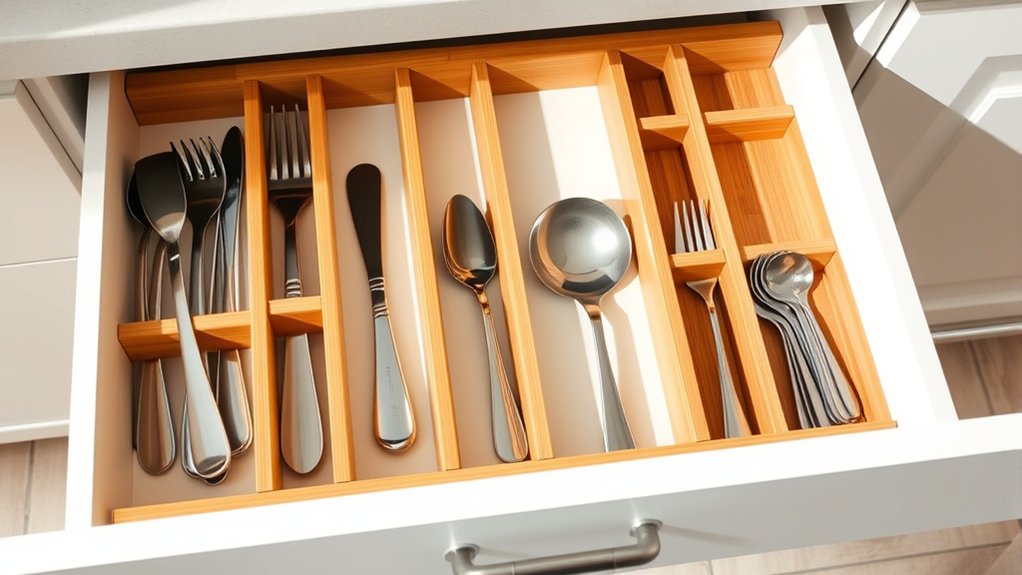
Before you organize your kitchen drawers, remove everything and sort it into keep, relocate, donate, and discard piles. Work one drawer at a time so the task feels manageable and you can see exactly what you own.
Throw away broken tools, expired products, duplicates, and items you never use. Move misplaced supplies to their proper locations, such as a pantry shelf or utensil container, and donate useful extras that no longer serve your needs.
Wipe each empty drawer with warm, soapy water, then dry it completely before returning anything. This step connects drawer care with your broader cleaning routines, helping you maintain a fresher kitchen.
As you decide what stays, consider your daily habits and available space. Keep only practical items that fit comfortably without crowding.
Apply the same standards during pantry organization, and repeat this quick decluttering process whenever drawers become difficult to open, search, or clean.
Group Utensils by Their Purpose
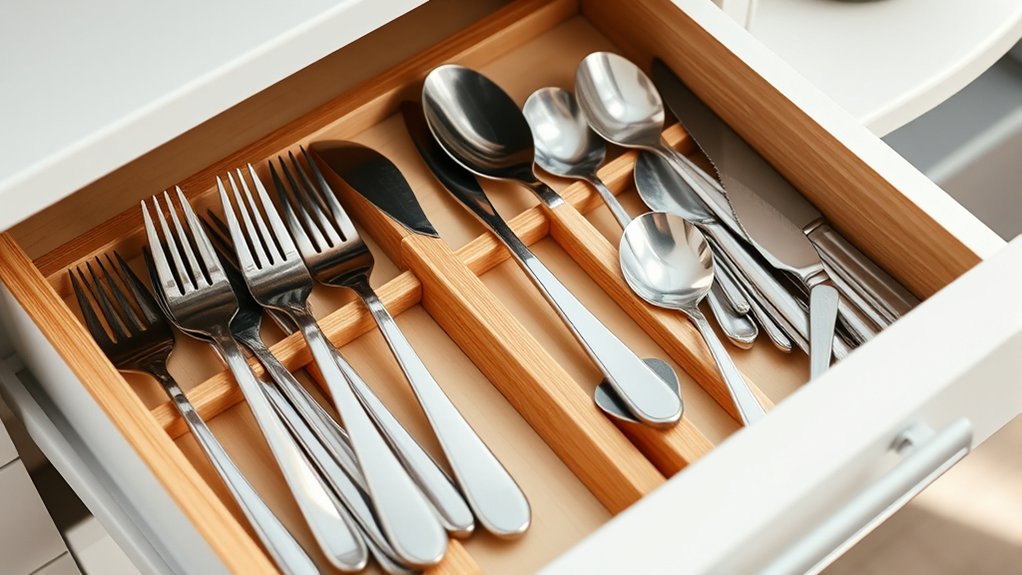
Group utensils by function so you can quickly find the right tool. Create separate zones for prep, cooking, and serving, and keep your favorite tools within easy reach.
Sort by Function
| Function | Examples |
|---|---|
| Stir and serve | Spoons, spatulas |
| Measure and prep | Cups, peelers |
Review each group and remove duplicates or damaged items. Place frequently used utensils toward the front, and store occasional tools farther back.
Return every item to its assigned category after washing it. This habit keeps drawers orderly and prevents categories from blending together.
As your cooking habits change, adjust the groupings to match how you actually use your utensils.
Create Cooking Zones
Once you’ve sorted utensils by function, arrange those categories into cooking zones based on where and how you use them. Build each zone around a specific task, such as chopping, cooking, baking, or serving.
This layout reduces unnecessary movement and keeps related tools together.
- Prep zone: Store peelers, graters, measuring cups, and knives near your main workspace.
- Cooking zone: Group spatulas, tongs, ladles, and wooden spoons beside the cooktop.
- Baking zone: Place whisks, pastry brushes, scoops, and rolling tools near mixing supplies.
- Seasoning zone: Keep measuring spoons and small tools together to support spice organization.
For efficient meal prep, assign a drawer to portioning tools, clips, and reusable wraps. Use dividers to define boundaries, label sections if needed, and return each item to its task-based zone after washing or use.
Keep Favorites Accessible
Keep your most-used utensils within easy reach by grouping them according to purpose. Place spatulas, wooden spoons, and tongs together near the stove, so you can grab cooking essentials without searching.
Store measuring cups and spoons in one section near your prep area, while peelers, graters, and knives belong together for produce preparation. Keep your Favorite tools easily accessible by positioning them in the front of each drawer or in a shallow organizer.
Arrange less frequently used gadgets behind them or in a separate drawer. Use dividers to prevent shifting and label sections if multiple household members share the kitchen.
Review your setup after a week and adjust placements based on your cooking habits. You’ll save time, reduce clutter, and keep every drawer functional during busy meal preparation.
Measure Drawers Before Buying Organizers
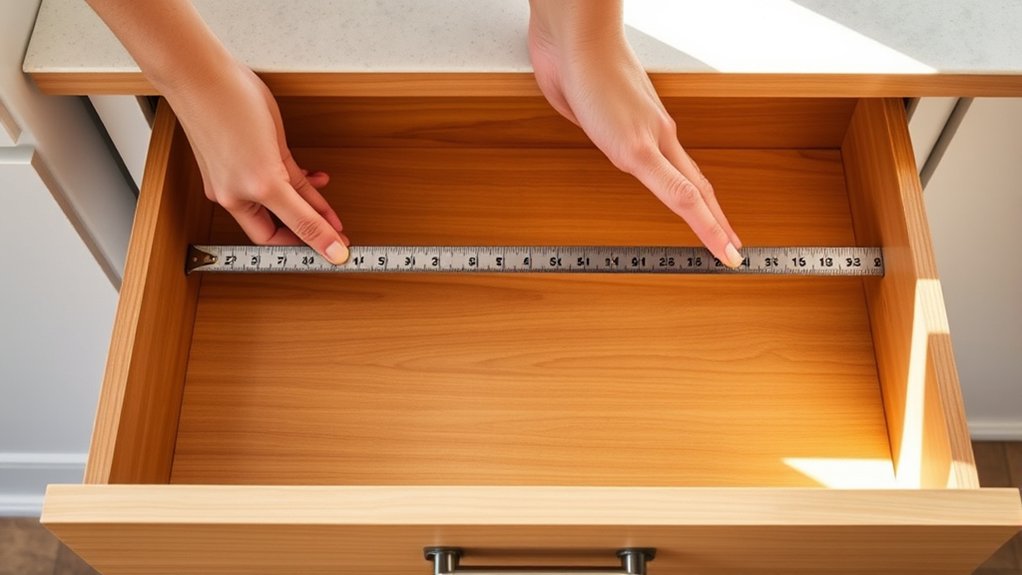
Before you buy organizers, measure your drawer’s width and depth. Leave enough clearance so the drawer can open and close smoothly. Then, check the dimensions of each organizer to make sure it fits.
Measure Width And Depth
Measure your drawer’s interior width and front-to-back depth before buying organizers so you know what will fit. Use a metal tape measure for accurate results, and record measurements in inches or centimeters consistently.
Don’t rely on cabinet dimensions. Drawers often have different interior sizes.
Use these measuring techniques:
- Measure the width at the front, center, and back.
- Record the smallest width to guide your drawer width analysis.
- Measure depth from the inside front edge to the back panel.
- Check the interior height if organizers have raised compartments.
Write each measurement in a note on your phone, then compare it with every organizer’s listed dimensions. Remember that product sizes may describe exterior measurements, so read specifications carefully.
Accurate numbers help you choose trays that fit neatly and use available space efficiently without guesswork.
Account For Drawer Clearance
Even when an organizer matches your drawer’s width and depth, you’ll need to account for clearance around the drawer box and cabinet frame. Open the drawer fully and inspect the gaps along both sides, the back, and the front.
Note any rails, hinges, screws, or uneven edges that could interfere with placement or movement. You’ll want enough room for the drawer to glide smoothly without rubbing against an organizer.
Check whether the cabinet opening narrows at any point, especially near the face frame. Also consider nearby doors or drawers that might collide when opened together.
This quick inspection improves drawer clearance and supports better space optimization. Record these obstacles before shopping, so you can choose an organizer that works with your drawer’s construction and daily movement.
Check Organizer Dimensions
Once you’ve checked the drawer’s clearance, measure its usable width, depth, and height, not just the exterior dimensions. Account for hinges, slides, rounded corners, and interior hardware that could limit an organizer’s fit.
Record your measurements before shopping, and compare them with each product’s listed dimensions.
- Measure the front, middle, and back widths. Drawers may taper.
- Check the depth from the inside front to the rear wall.
- Measure the height below the drawer opening or frame.
- Leave a small margin so the organizer slides in easily.
Choose adjustable trays when measurements vary, and avoid filling every inch. Consider Countertop placement for items that don’t fit comfortably, such as tall tools or appliances.
After installation, use Drawer labeling to identify sections and keep each item in its assigned space. Recheck the fit before removing the packaging.
Choose Dividers and Non-Slip Inserts
Choose adjustable dividers to separate utensils, tools, and gadgets, then add non-slip inserts to keep everything in place when you open and close the drawers.
When choosing dividers, look for sturdy plastic, bamboo, or metal options that fit your drawer’s width and depth. Adjustable designs let you create sections without wasting space or committing to a fixed layout.
Measure each divider before installation, and leave enough room for items to slide out easily.
For selecting non slip inserts, choose washable liners with a textured surface and trim them to fit the drawer floor. Avoid bulky materials that reduce usable height or prevent the drawer from closing smoothly.
Place liners beneath dividers to protect the drawer and reduce rattling. Test the arrangement by opening and closing the drawer several times.
If pieces shift, tighten the divider settings or add another liner layer. Clean both inserts and dividers regularly to prevent crumbs and residue from building up.
Store Everyday Tools Within Easy Reach
Keep the utensils and tools you use most often in the front or top drawer, where you can reach them without searching. Place frequently used items at the same height as your dominant hand, and leave enough space to remove each one smoothly. This setup supports ergonomic accessibility and keeps meal preparation moving.
Use this quick placement plan:
- Put wooden spoons, spatulas, and tongs near the drawer’s front.
- Keep measuring spoons and cups together in a shallow section.
- Position peelers, can openers, and scissors in a secure compartment.
- Reserve a narrow slot for your favorite whisk or serving tool.
Choose compartments that match each tool’s shape instead of forcing everything into one crowded space. Specialized storage, such as a knife block insert or angled utensil tray, can protect tools and make them easier to identify.
Return every item to its assigned place after washing it. You’ll quickly notice when something’s missing, and you won’t need to dig through the drawer during cooking. Keep the arrangement flexible as your routines change.
Store Small Gadgets by Frequency of Use
Extend that same easy-access system to small gadgets by sorting them according to how often you use them. Keep daily essentials, such as peelers, measuring spoons, and garlic presses, in the drawer you open most.
Place weekly tools nearby, while occasional gadgets can occupy a less convenient drawer. This Small gadget categorization keeps your routine smooth and prevents rarely used items from crowding prime space.
| Use frequency | Suggested placement |
|---|---|
| Daily | Front section of your main drawer |
| Weekly | Back section of that drawer |
| Monthly | Secondary kitchen drawer |
Use dividers or compact bins to give each gadget a defined home. Group similar items, but let frequency guide their position.
Label containers if several gadgets look alike, so you won’t waste time searching. Review the arrangement every few months and move tools when your habits change.
This Frequency based storage approach makes each drawer easier to scan, reduces clutter, and helps you return every gadget quickly after use. Keep only functional items, and remove duplicates that steal valuable space.
Add Tiered Storage to Deep Drawers
When deep drawers leave items stacked out of sight, add tiered organizers to create visible levels. Tiered storage lets you see more at a glance, so you’ll spend less time digging and reshuffling.
Choose adjustable risers or stackable platforms that fit your drawer’s width, depth, and height. Measure before shopping, and leave enough clearance for smooth opening.
Use this simple setup:
- Place everyday containers on the front tier for quick access.
- Put less frequently used pieces on the raised back tier.
- Group similar items, such as baking tools, serving supplies, or food-storage lids.
- Label sections only when they’ll help everyone return items correctly.
Keep platforms stable by adding nonslip liner beneath them. Avoid overcrowding each level. A little empty space makes removal easier and supports consistent deep drawer organization.
If the drawer holds heavy items, select sturdy organizers designed for kitchen use. Review the arrangement after a week, then adjust tier heights or categories to match your routine.
Your drawer will stay orderly without constant effort.
Keep Kitchen Knives Safe in Drawers
Keep your kitchen knives safe with a dedicated drawer insert that holds each blade securely. It separates the blades to prevent contact, damage, and accidental cuts. Plus, each handle stays firmly in place whenever you open or close the drawer.
Use Knife Drawer Inserts
A knife drawer insert keeps blades secure, separated, and easy to reach without letting them shift or damage other utensils. Choose an insert that fits your drawer’s width and depth, then measure each knife before buying.
Look for sturdy wood, bamboo, or nonslip plastic with slots sized for different blades.
- Measure first: Confirm the insert leaves room for the drawer to close smoothly.
- Match slots: Select spaces that hold chef’s, utility, and paring knives firmly.
- Position thoughtfully: Place the insert where you can lift handles comfortably.
- Clean regularly: Remove crumbs and moisture to protect the insert and knives.
A dedicated insert also supports good blade maintenance by reducing contact with clutter. Schedule knife sharpening when blades begin dragging, and return each knife to its assigned slot afterward.
You’ll keep the drawer orderly and make preparation safer every day.
Separate Blades Safely
Separate kitchen knives with blade guards, sheaths, or individual slots so sharp edges don’t scrape against one another or catch your fingers. Leave enough space between blades to remove each knife without brushing nearby edges.
Choose guards that fit snugly and cover the entire cutting surface, including pointed tips. This practice supports Knife safety and simplifies Blade maintenance by preventing nicks, scratches, and dulling.
| Blade type | Best protection |
|---|---|
| Chef’s knife | Full-length sheath |
| Paring knife | Individual guard |
| Serrated knife | Rigid cover |
Check guards regularly for cracks, loose closures, or exposed metal, and replace damaged protection immediately. Store knives flat, with blades facing away from the drawer opening.
Keep guards clean and dry to prevent trapped moisture, odors, and corrosion. Don’t place unprotected knives beneath utensils, where hidden edges can cause injuries during quick searches.
Reassess protection whenever you reorganize the drawer.
Secure Handles Firmly
Once blades are covered, secure each knife by its handle so it won’t slide, rotate, or shift when you open the drawer. Proper handle safety protects your fingers and keeps tools easy to retrieve.
Choose a drawer organizer with snug slots, clamps, or adjustable dividers that match each knife’s size. For reliable storage:
- Place heavier knives in deeper, sturdier compartments.
- Keep handles facing the same direction for quick identification.
- Add silicone liners to prevent sliding and provide better grip.
- Leave space between handles so you can lift one without bumping another.
Check the fit by gently opening and closing the drawer. If a knife moves, tighten the divider, reposition the liner, or use a dedicated knife block insert.
Don’t pile utensils over secured handles, and inspect fasteners regularly for looseness or damage.
Make Narrow Drawers Work Harder
Turn narrow drawers into efficient storage by using slim organizers that keep utensils, tools, or wraps upright and easy to reach. Maximizing narrow drawer space starts with matching each insert to the drawer’s width, so you won’t waste room beside bulky compartments.
Choose adjustable dividers to create snug sections for measuring spoons, chopsticks, peelers, or small gadgets. You can also reserve a shallow drawer for rolls of foil, parchment, and plastic wrap. Stack them horizontally or install a dispenser that lets you cut sheets without removing each roll.
Utilizing vertical storage helps you fit more without cramming. Place tools on their sides in narrow slots, or use tiered inserts that raise items at the back. Keep frequently used pieces near the front and group similar tools together for faster access.
If a drawer is exceptionally tight, store only one category there, such as baking tools or coffee supplies. Measure before buying organizers, and leave enough clearance for smooth opening and closing.
Maintain Your Kitchen Drawer System
Efficient narrow drawers stay useful when you maintain them regularly. A quick weekly reset prevents clutter, protects your supplies, and keeps every tool easy to find. Remove items that don’t belong, wipe surfaces, and return each object to its assigned space.
- Declutter routinely: Pull out everything monthly and discard expired items, duplicates, or damaged tools.
- Clean strategically: Wipe crumbs and spills immediately, especially around Ingredient storage containers. Keep Cleaning supplies accessible, but separate from food-related drawers.
- Check fit: Adjust dividers when tools shift, and choose containers that use the drawer’s full depth without blocking movement.
- Refresh labels: Replace unclear labels and update them when your cooking habits or household needs change.
After each grocery trip, check your ingredient drawer before adding anything new. Group similar items, place frequently used tools toward the front, and leave a little open space.
Your system will stay practical when you make maintenance part of your regular kitchen routine. Encourage everyone at home to follow the same arrangement, so organization lasts between resets.
Frequently Asked Questions
How Often Should Kitchen Drawers Be Completely Reorganized?
You should completely reorganize your kitchen drawers every three to six months, or whenever clutter makes items difficult to find. During each reset, remove everything, discard duplicates, wipe surfaces, and return tools according to how often you use them.
Strong organizational habits may extend the interval, while busy households might need monthly adjustments. Include quick drawer maintenance weekly to prevent buildup, shifting items, and misplaced utensils from becoming larger problems later.
What Materials Are Best for Long-Lasting Kitchen Drawer Organizers?
Choose bamboo, solid wood, stainless steel, or high-quality plastic for long-lasting kitchen drawer organizers. Bamboo and wood offer strength and warmth, while stainless steel resists moisture, stains, and warping.
Durable plastic works well when you need lighter, washable pieces. Consider Material durability alongside Storage versatility: select adjustable dividers, modular trays, and nonslip inserts that fit changing utensils.
Avoid thin, brittle plastic, which can crack, slide, or lose its shape quickly.
How Can Renters Organize Drawers Without Making Permanent Modifications?
Treat your drawers like a puzzle you can rearrange: use removable drawer dividers and utensil trays that fit without screws, nails, or adhesive. Choose adjustable, nonslip options so you can customize sections and prevent shifting.
Measure each drawer first, then group tools by purpose and frequency. Add thin, washable liners for grip and easy cleaning.
When you move, simply lift everything out, wipe the drawers, and take your organizers with you.
Should Kitchen Drawers Be Labeled for Easier Household Organization?
Yes, you should label kitchen drawers if several people share your home or items frequently get misplaced. A clear Labeling system improves Drawer identification, speeds up cooking, and helps everyone return tools to their proper places.
Use removable adhesive labels, chalkboard stickers, or clip-on tags to avoid permanent changes. Keep wording simple, such as “utensils,” “baking,” or “food storage.”
Skip labels for obvious drawers to prevent unnecessary visual clutter and maintenance.
How Can Children Safely Access Kitchen Drawers?
Choose low drawers for child-friendly items, such as plastic containers, unbreakable cups, and wooden utensils. Keep knives, scissors, cleaners, medicines, and other hazards in high, secured storage.
Install reliable drawer locks on any drawer containing dangerous objects, and test them regularly. Add rounded-edge organizers to prevent sharp corners and clutter.
For better Child safety, teach your child which drawers they may open, supervise access, and inspect hardware as they grow.
Conclusion
An organized kitchen drawer saves time, reduces clutter, and makes cooking feel easier. Once you’ve decluttered, grouped tools, measured spaces, and added practical dividers, you’ll know exactly where everything belongs.
Keep frequently used items close, protect your knives, and use every narrow or deep drawer wisely. Spend a minute maintaining your system each week to keep chaos at bay.
With these simple habits, your kitchen will run like a well-oiled machine every day. An organized kitchen drawer makes it easier to stay efficient and enjoy your cooking space.