How to Draw a Kitchen in 7 Easy Steps
Drawing a kitchen can feel overwhelming when you’re unsure where to start, especially if you want realistic perspective and balanced details. You’re not alone—many people struggle to make cabinets, appliances, and fixtures look proportional.
This guide, How to Draw a Kitchen in 7 Easy Steps, makes the process simple and approachable.
To draw a kitchen in seven easy steps, first establish the horizon line, vanishing point, and room perspective.
Next, outline the walls, floor, windows, and doors.
Add box-shaped cabinets, countertops, and a backsplash.
Place the sink, stove, and refrigerator with consistent proportions.
Arrange small appliances and useful kitchen items.
Then draw ceiling lights and fixtures.
Finally, apply shadows, textures, highlights, and balanced color.
Follow the detailed steps below to refine your kitchen drawing with confidence.
Key Takeaways
- Establish the horizon line, vanishing points, and basic room outline to create accurate kitchen perspective.
- Sketch cabinets, countertops, backsplashes, windows, doors, and lighting fixtures using simple geometric shapes.
- Place major appliances and kitchen items while maintaining realistic proportions, spacing, and an efficient workflow.
- Add consistent lighting, contact shadows, and darker tones beneath cabinets and appliances to create depth.
- Apply colors, textures, highlights, and decorative details while keeping the composition balanced and clean.
Set Up the Kitchen’s Perspective
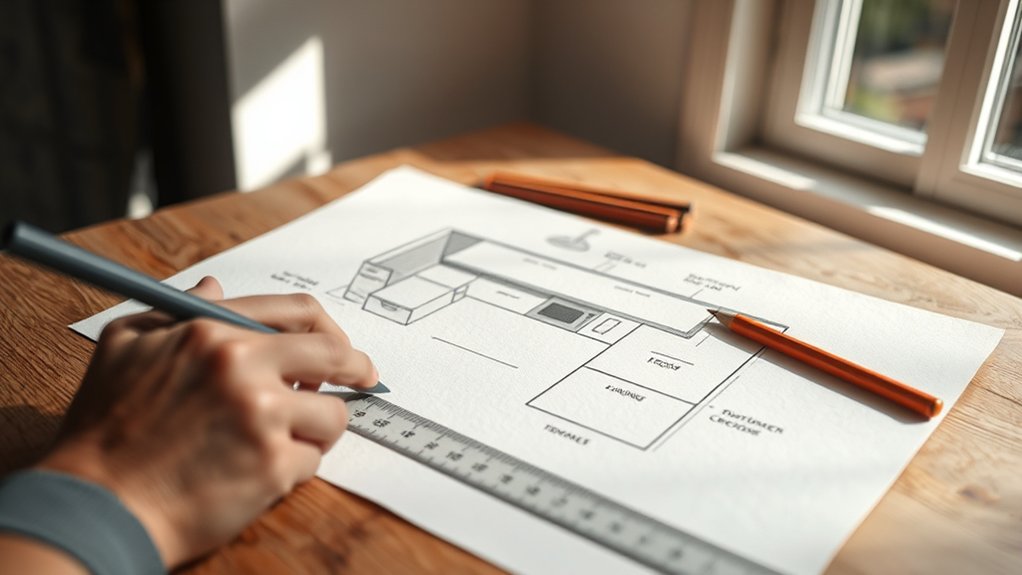
Before drawing the cabinets or appliances, establish the kitchen’s perspective with a horizon line and vanishing points. Place the horizon near eye level to show how you’ll view the room.
> Establish the kitchen’s horizon and vanishing points first to create a convincing sense of depth and viewing perspective.
For a one-point perspective, position one vanishing point on the horizon and aim receding lines toward it. For a two-point perspective, use two vanishing points to show corners and angled surfaces naturally.
Next, sketch a light centerline to guide your composition. Consider the furniture arrangement before adding details. Decide where the table, chairs, or island will sit, then check that their edges follow the same perspective guides.
You can also mark likely positions for lighting fixtures, such as pendants or recessed lights, while keeping them aligned with the ceiling’s perspective. Use faint construction lines and avoid heavy marks.
This setup gives every later element consistent scale, depth, and direction without locking you into unnecessary details.
Outline the Room, Walls, and Floor
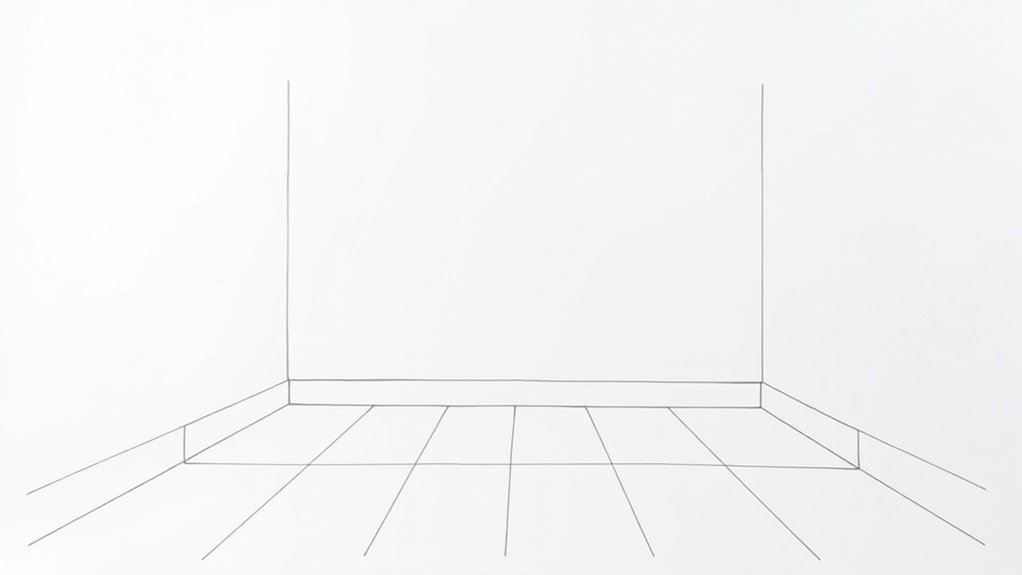
With your perspective guides in place, outline the kitchen’s back wall, side walls, and floor using light, confident strokes. Keep each edge aligned with its vanishing point so the room feels balanced.
Draw the back wall first, then extend the side walls toward the foreground. Add the floor plane with clean diagonal lines, spacing them to suggest depth without crowding the sketch.
As you build the framework, consider how the furniture arrangement will occupy the open space. Leave enough room for walking paths, and keep the proportions believable.
Mark windows or doors only as simple openings for now. You can also indicate where lighting fixtures might hang, ensuring their placement supports the room’s perspective.
- Use lighter lines for distant edges.
- Check angles before adding detail.
- Keep the floor open and readable.
Erase overlapping guides carefully, but don’t darken permanent outlines until the structure looks correct. A clear room outline gives every later element a solid, convincing setting.
Draw Cabinets, Counters, and Backsplash
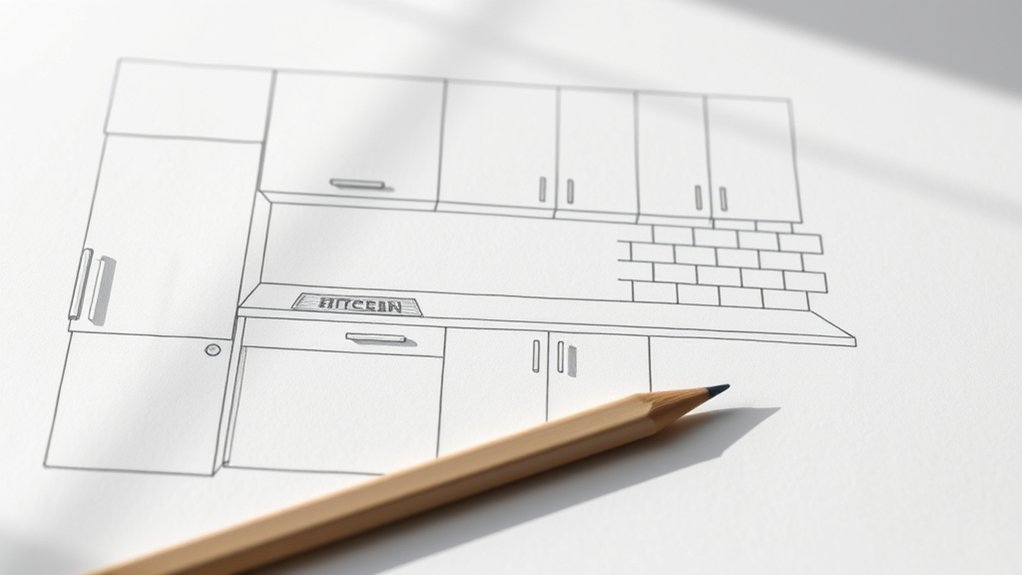
Next, sketch the base cabinets along the walls, keeping their widths and spacing consistent. Then, add the countertops above them and draw the backsplash between the counters and the upper wall area.
Sketch Base Cabinets
Once the perspective lines are established, sketch the base cabinets along the kitchen walls, keeping their tops level and their depths consistent. Block each unit as a simple box, then divide the run into doors, drawers, and corner sections.
Keep vertical seams aligned, and use light strokes so you can adjust proportions easily. Consider how cabinet styles change the rhythm of the room:
- Shaker doors create clean, balanced rectangles.
- Flat-panel fronts produce a smooth, modern rhythm.
- Raised panels add traditional visual weight.
Mark toe-kicks beneath the doors and leave gaps where appliances will fit. Vary line pressure to suggest material textures, such as smooth painted wood or subtle grain, without adding detailed shading yet.
Check the cabinet run against your perspective guides, ensuring every front face follows the same vanishing points. Keep details simple until the structure looks convincing.
Add Counters And Backsplash
Add the countertop by tracing a thin, continuous slab over the cabinet boxes, following the same perspective lines and allowing a slight overhang at the front edge. Keep the front edge parallel to the cabinet faces, then darken the underside to show thickness.
Choose counter materials that suit your kitchen’s style, such as stone, wood, or laminate. Add subtle seams or speckles without overcrowding the drawing.
Next, draw the backsplash as a narrow band between the counter and upper cabinets. Follow the wall’s perspective, keeping its top and bottom edges aligned.
Add simple backsplash patterns, such as horizontal tiles, squares, or a herringbone arrangement. Vary line weight to separate grout from tile surfaces.
Include a sink cutout, faucet, and any visible outlets to make the counters feel practical and complete.
Add the Sink, Stove, and Refrigerator
Place the sink beneath a window or along an open section of countertop, then position the stove nearby with a hood above it. Sketch each appliance with simple rectangles, keeping their sizes consistent with your kitchen’s perspective.
Add cabinet gaps, handles, and a faucet to make the sink recognizable without overloading the drawing.
Place the refrigerator on the opposite wall or at the counter’s end. Leave a narrow clearance around its doors, and align its top with nearby cabinets for a balanced look.
These kitchen appliances should create a practical work triangle:
- The sink supports preparation and cleanup.
- The stove anchors cooking activity.
- The refrigerator provides convenient food access.
Use darker lines under the appliances to ground them, then add gentle shading for depth.
Match their finishes to your interior decor: choose clean metallic tones for a modern room or softer colors for a traditional kitchen.
Keep surfaces uncluttered so the layout stays clear and easy to read.
Place Small Appliances and Kitchen Items
Arrange small appliances and everyday kitchen items where they support the room’s workflow without crowding the counters. For your drawing, choose a toaster near the food-preparation area, a coffee maker beside mugs, and a blender close to the sink. Show each object with simple geometric shapes, then add details such as buttons, handles, cords, or vents.
Use appliance placement to make the kitchen feel practical. Keep frequently used tools within easy reach, while placing less-used appliances inside cabinets or on a high shelf.
Group matching items together: set knives near the cutting board, store utensils in a container, and place cookware near the stove. Add jars, bowls, a dish rack, or a fruit basket to make the scene feel lived-in.
Good kitchen organization creates clear zones and keeps pathways open. Vary the sizes and angles of your objects so the arrangement doesn’t look stiff.
Leave enough counter space between items to maintain balance and show a believable working surface.
Draw Windows, Doors, and Ceiling Lights
Once the main kitchen layout is set, draw windows, doors, and ceiling lights to define the room’s structure and atmosphere. Place windows on the wall that best supports the perspective.
Use simple rectangles, then add frames, sills, and handles. Consider how your window design balances cabinets, counters, and open wall space.
Sketch the door next, showing its width, swing, and connection to nearby surfaces. Keep its lines aligned with the floor and walls so the kitchen feels believable.
For lighting, mark a ceiling fixture above the main work area or island. Draw its shape lightly, whether it’s a pendant, flush mount, or row of recessed lights.
Use these elements to communicate function and mood:
- Windows suggest ventilation, views, and natural openness.
- Doors clarify movement through the kitchen.
- A ceiling fixture establishes the room’s visual center.
Check spacing and perspective before refining outlines. Keep every opening and light proportional to the room.
Avoid adding shadows, textures, or color until the structural drawing feels accurate.
Add Shadows, Details, and Color
Add realistic shadows beneath cabinets, counters, and appliances to give your kitchen greater depth. Then, bring the space to life with colorful details such as dishware, curtains, plants, and small appliances. These finishing touches will make the scene feel more lively and complete.
Add Realistic Shadows
Shadows will make your kitchen drawing feel grounded and three-dimensional. Place them beneath cabinets, along countertop edges, and inside corners where light has less reach.
Choose one consistent light source before adding darker areas. Observe how lighting affects each surface, then keep highlights opposite your shadows. Use gradual transitions instead of harsh outlines to suggest realistic depth.
- Under cabinets: Add a narrow, soft band that deepens near the wall.
- Countertops: Cast subtle shadows below appliances, sinks, and raised edges.
- Corners and floors: Darken enclosed spaces and add gentle contact shadows beneath furniture.
Vary shadow strength according to distance. Objects touching a surface need darker contact marks, while cast shadows should fade outward.
Keep your shadow placement consistent across the room, and blend lightly so the kitchen remains clean and believable.
Include Colorful Details
Bring your kitchen drawing to life with a few colorful details that build on its shadows and structure. Choose a warm palette for cabinets, such as honey, cream, or soft blue, then shade each door to keep its form clear.
Add colorful accents through red towels, green plants, or yellow dishes. Use darker tones beneath counters, inside cabinets, and around appliances to strengthen depth.
Highlight metal handles and faucets with small white strokes, leaving some edges bright. Create vibrant textures by varying your marks: use short lines for wood grain, tiny dots for stone, and smooth layers for painted surfaces.
Keep colors within the outlines, but let subtle reflections overlap nearby areas. Finally, balance bold hues with neutral walls and floors, so your kitchen feels lively without looking crowded.
Frequently Asked Questions
What Drawing Tools and Materials Are Best for Beginners?
You’ll need a few simple tools to start drawing: an HB pencil, a softer 2B pencil, a quality eraser, a ruler, and smooth, medium-weight sketch paper. Add colored pencils or markers for experimenting with Color palettes.
Use a fine-line pen to define details after your pencil work dries or settles. Practice basic shading techniques with graphite first, then try blending stumps or tissues. A sharpener keeps your lines clean.
How Long Does It Typically Take to Complete a Kitchen Drawing?
You’ll typically spend 30 minutes to two hours completing a kitchen drawing, depending on its detail and your experience. A simple sketch may take 30–45 minutes, while a polished scene can require several hours.
You’ll work faster as you practice Perspective techniques, plan the layout, and simplify objects. If you add Color blending, realistic textures, shadows, and highlights, expect extra time.
Set a timer, take breaks, and enjoy steady progress without rushing yourself.
Can I Draw a Kitchen Without Any Previous Artistic Experience?
Yes, you can draw a kitchen without previous artistic experience. Start with simple shapes for cabinets, counters, appliances, and windows, then add details gradually.
Choose a cartoon style if you want friendly, forgiving results, or practice realistic textures for wood, tile, metal, and glass. Use reference photos, sketch lightly, and don’t worry about mistakes.
With patience and regular practice, you’ll quickly improve your proportions, perspective, shading, and confidence while creating appealing kitchen drawings.
Which Software Is Useful for Creating Digital Kitchen Illustrations?
You can use Procreate, Adobe Fresco, SketchUp, or Blender for digital kitchen illustrations—because apparently your countertop now needs software approval.
Procreate and Fresco make intuitive drawing and painting easy, while SketchUp helps you build accurate cabinets, appliances, and perspectives.
Blender offers detailed 3D scenes and lighting. Compare these tools with Traditional sketching, then refine your ideas through Digital rendering.
Choose based on your comfort, budget, and desired realism.
How Can I Practice Improving My Kitchen Drawing Skills?
Practice by sketching your kitchen from several viewpoints, starting with simple boxes for cabinets, counters, appliances, and tables. Focus on perspective accuracy by checking parallel lines, vanishing points, and proportions against reference photos.
Draw quick five-minute studies daily, then refine one scene with details. Experiment with color blending to create believable wood, metal, glass, and lighting.
Compare your work regularly, note mistakes, and repeat challenging areas until they feel natural.
Conclusion
With these seven steps, you’ve turned simple lines into a believable kitchen. Don’t worry if your first drawing feels uneven; every sketch teaches you something.
One beginner once redrew a crooked counter three times, then realized the “mistake” helped create a cozy, lived-in space. Like cooking, drawing improves through small adjustments.
Keep checking perspective, layering details, and adding shadows. Soon, your kitchen drawing won’t just look accurate—it’ll feel welcoming, personal, and ready for stories.